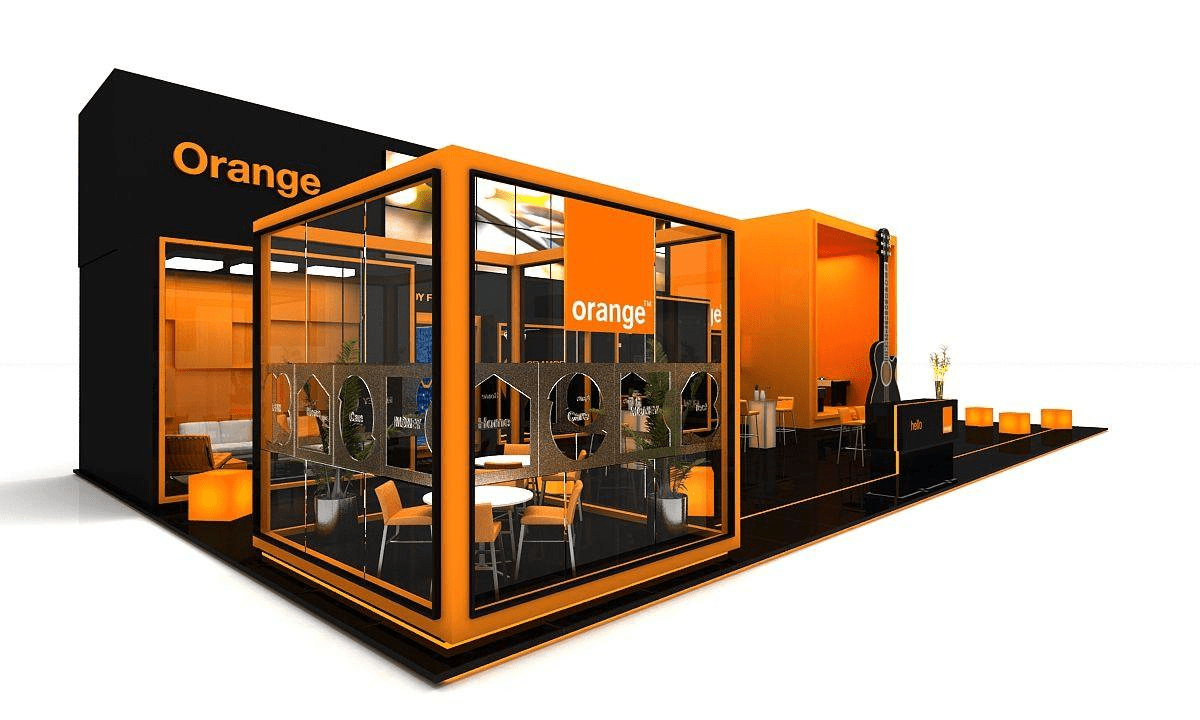
Walk any aisle at the Orange County Convention Center and you will see the same thing play out. One booth looks stunning and sits empty. The one next to it is a plain 10×10, and it is three people deep.
The difference is rarely budget. It comes down to how well the exhibitor planned the booth around attendee behavior, not just how the booth looks in a photo.
This guide breaks down how to design a trade show booth step by step. We will cover goal setting, layout, size, and the small details that turn foot traffic into real leads. We will also get specific about trade show booth design in Orlando, since local venue rules and Florida’s packed show season change what actually works here.
Start With Strategy, Not Graphics
Most exhibitors jump straight to colors and furniture. Slow down. The booths that perform best start with three questions.
What does success look like? Lead volume, live demos, brand awareness, and hiring all need different layouts. A team chasing leads needs open space and fast badge scanning. A company launching a product needs room for a demo, not a hallway.
Who is walking the floor? Your messaging and layout should shift based on the audience. Buyers, engineers, and executives all respond to different pitches.
What is the real budget? Structure and graphics are only part of the cost. Shipping, labor, storage, and show services add up fast. Working this out early saves you from surprises two weeks before move-in.
Choose the Right Booth Size and Layout
This is where most first-time exhibitors get stuck. Booth size affects everything else, from traffic flow to how much staff you need on the floor.
- Inline booths (10×10, 10×20) work well for smaller budgets and teams. Check out our 10×10 rental options if this is your first show.
- Corner and peninsula booths open sightlines from two or three aisles without a big jump in cost.
- Island booths, like a 20×20 layout, open on all sides. They give you room for demos, meetings, and lounge space.
If you want to compare footprints against your budget and goals, read our guide on how to choose the right trade show booth size.
20x30 Custom Trade Show Booth Design
A 20×30 custom trade show booth design hits a sweet spot for mid-size exhibitors. It is big enough for a product zone and a small meeting area. It also skips the six-figure price tag of a full island build.
This size usually supports three zones. An open area near the aisle for greeting visitors. A demo area in the middle. A private meeting space toward the back.
If you are scaling up from a 10×20, browse our 20×30 booth options to see what fits your plan.
30x30 Trade Show Booth Ideas
At 30×30, you move into island territory, and the design options open up. Good 30×30 trade show booth ideas usually include a two-sided reception counter so staff can greet people from multiple aisles.
Add a raised product display and at least one enclosed meeting room. Strong lighting helps create a clear focal point that pulls attendees in from a distance.
Since this size gets seen from every angle, every side needs to look finished, not just the front. Take a look at our 30×30 booth rental designs for real examples.
Design for the 3-Second Decision
Attendees decide if they will approach a booth almost instantly. Your design has three jobs: show who you are, what you do, and why it matters.
Keep these in mind:
- Pick one core message. Not five. Let everything else support it.
- Make your branding recognizable. Match your colors, logo, and fonts to your other marketing so people know your brand before they read a word.
- Design for visibility from a distance. Use tall signage, strong lighting, and high contrast graphics instead of dense text blocks nobody stops to read.
Color choice matters more than most exhibitors think. It affects mood and how long people stay near your booth. Our post on the psychology of color in trade show booth design is worth a read before you lock in your graphics.
Add Interactive Elements That Earn Real Engagement
A great booth gets people to look. Interactive elements get them to stay. The exhibits with the strongest lead numbers usually mix a few of these:
- Live product demos or hands-on stations
- Touchscreens, video walls, or AR/VR for products that are hard to explain in a short conversation
- A meeting or lounge area for private conversations
- Fast lead capture through badge scanners or digital forms
- A quick game, like a prize wheel, to pull in attendees who would otherwise walk past
Do Not Forget the Attendee Experience
This is one of the biggest gaps in how to design an exhibit booth well. Exhibitors focus on the structure and forget the people standing in it.
A few things worth prioritizing:
- Keep the entrance open. Furniture blocking the entry point quietly kills traffic.
- Add ADA-compliant pathways and accessible counters.
- Give staff a real place to store bags, charge phones, and set down a coffee.
- Add small touches like seating or refreshments. They do more for dwell time than people expect.
Common Mistakes to Avoid
Even well-funded booths underperform when they trip over the same mistakes.
- Overcrowding. Too much furniture and messaging creates noise and blocks traffic.
- Too much text. Attendees move fast. If it takes more than a few seconds to read, it will not get read.
- Looks over function. A booth that photographs well but has no clear staff flow will underperform on the floor.
- Ignoring logistics. Shipping timelines and venue rules can wreck a design that looked perfect on paper.
- Skipping expert input. A second set of experienced eyes catches problems before they cost you a show.
Booth Design Tips for Exhibitors Showing in Orlando
Orlando exhibitors have a few extra things to plan around, thanks to the city’s packed show calendar and venues like the Orange County Convention Center, Rosen Shingle Creek, and Gaylord Palms. A few booth design tips for exhibitors working this circuit:
- Plan around drayage and labor rules at OCCC. Move-in and move-out requirements affect what materials make sense.
- Choose modular or reusable pieces if you are hitting several Florida shows in one season. Orlando’s calendar runs heavy from fall through spring.
- Account for Florida humidity with any exposed materials or printed graphics.
Custom Exhibit Design or Rental? How to Decide
If you exhibit once or twice a year, custom exhibit design built around one show can make sense. But most Orlando exhibitors hitting three or more shows a year get more value from a modular rental that reconfigures across different booth sizes.
The right choice depends on how often you exhibit, your budget, and how much flexibility you need. At Orlando Exhibit Rentals, we help exhibitors evaluate both options based on those factors rather than recommending the same solution for every project.
Work With a Local Team That Handles the Whole Process
Exhibit booth design in Orlando works best when the same team handles design, fabrication, shipping, and setup. It removes the handoff gaps where things usually go wrong.
That is how Orlando Exhibit Rentals works with local exhibitors, from the first sketch through move-out at OCCC and the region’s other major venues. Our team knows the local venues, the local rules, and what it takes to get your booth built right the first time.
Ready to see what a booth built around your goals could look like? Get a free quote and we will help you map out size, layout, and budget for your next show.
Frequently Asked Questions
How much does it cost to design a trade show booth in Orlando?
Costs depend on booth size and features. A basic 10×10 rental can start in the low thousands. A fully custom 20×30 or 30×30 island exhibit with AV, meeting rooms, and custom graphics can run into five or six figures. Rental packages usually cost less than ground-up custom builds.
What is the best booth size for a first-time exhibitor?
Most first-time exhibitors do well with a 10×10 or 10×20 inline booth. It keeps costs manageable while you learn what works before scaling up to a corner, peninsula, or island footprint.
How do I make my booth stand out without overspending?
Put your budget into one or two high-impact pieces, like strong lighting or a single interactive demo, instead of spreading it thin. Clear messaging and a welcoming layout matter more than expensive add-ons.
Should I rent or buy a trade show booth in Orlando?
If you exhibit at several shows a year, a modular rental usually offers better flexibility and a lower long-term cost. If you have one signature event and want a fully unique look, a custom build may be worth it. Orlando Exhibit Rentals can help you weigh both against your show schedule.
How far in advance should I start planning my booth design?
Plan at least 8 to 12 weeks out for a rental, and 4 to 6 months out for a fully custom exhibit. This gives enough time for design approval, production, shipping, and venue logistics.
What should I avoid when designing a trade show booth?
Avoid overcrowding the space, using dense text, blocking the entrance with furniture, and locking in a design before checking venue and shipping logistics. These mistakes quietly reduce traffic even in an otherwise good-looking booth.
CONTACT US
AND AN EXHIBIT EXPERT WILL GET BACK TO YOU SHORTLY!
