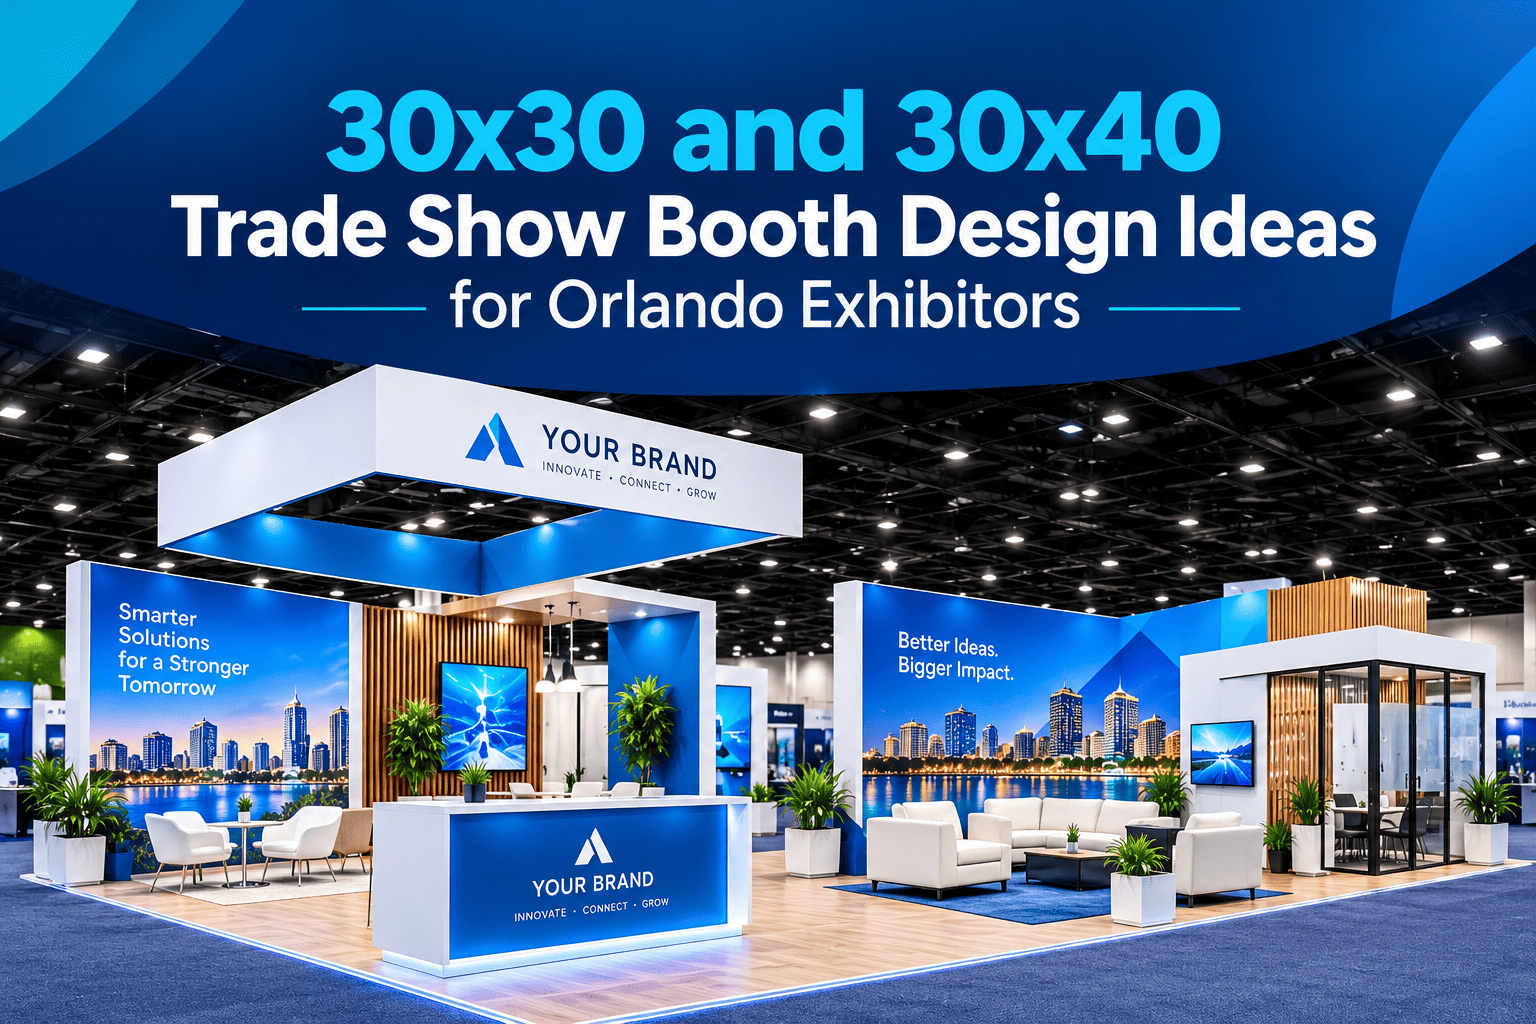
When a company books a large island space at the Orange County Convention Center, the conversation usually shifts from “what can we fit?” to “how do we make 900 or 1,200 square feet work for us?” That is a very different problem from filling a 10×10, because a booth of this size has to handle crowds, meetings, product demonstrations and storage without turning into an open warehouse floor. In this guide, Orlando Exhibit Rentals walks through 30×40 trade show booth design and 30×30 trade show booth design, covering how to plan the floor, which features earn their place, and what to consider before you commit to a build or a rental.
What You Are Working With: 30x30 vs. 30x40
A 30×30 booth covers 900 square feet, and a 30×40 covers 1,200. The extra 300 square feet may not sound like much on paper, but on the show floor it is roughly the size of an additional meeting suite or a full demo zone. Both sizes are normally sold as island exhibits, meaning visitors can approach from all four sides, so there is no single back wall to hang your graphics on and every side of the structure becomes a face of your brand.
That open layout is the biggest advantage and the biggest design challenge. You are visible from every aisle, but you also have to look good from every angle, and your staff needs to be able to watch the entire perimeter. A strong 30×30 booth design or 30×40 layout starts with traffic flow rather than decoration.
Which size suits you depends mostly on how many separate activities the booth has to hold. Exhibitors who need one demo area and a small meeting room often find that 900 square feet is enough, and the 30×30 booth rental options show how that footprint is usually divided. Teams that also want a lounge, a second meeting room or a larger product zone tend to move up to a 30×40 trade show booth rental, and for companies that find even 900 square feet more than the show requires, a 20×30 exhibition booth is a smaller step down that still gives room for a proper meeting area.
30x40 Trade Show Booth Design: Start With the Floor Plan
Before choosing finishes or graphics, divide the footprint into zones. Most successful large exhibits settle on four or five areas, each with a clear purpose.
A welcome zone near the busiest aisle. Put a reception counter or a branded product display at the corner that attracts the most traffic. Staff stationed here can greet visitors and direct them toward the area that suits their interests.
A product or demonstration area. This is where visitors spend most of their time, so it needs space for small groups to gather without blocking the aisle. In a 30×40 trade show booth design, this zone often takes up a third of the floor.
Meeting rooms or semi-private spaces. Larger exhibits often include one or two enclosed or semi-enclosed rooms for sales discussions. Closing the room off with solid walls and a door allows confidential conversations, while frosted panels or half-height walls give a lighter feeling.
A lounge or hospitality corner. Comfortable seating, a small café-style counter or a charging station gives visitors a reason to stay, which keeps them in front of your team longer.
A storage and staff area. A lockable closet or back-of-house room keeps literature, coats, laptops and spare products out of sight, and it matters more than most first-time exhibitors expect over a three- or four-day event.
Sketching these zones onto a scaled floor plan before any rendering is made helps your team spot problems early, such as a demo area that blocks the main entrance or a meeting room without enough sound separation.
30x30 Booth Designs That Work
A 30×30 has less room for extras, so the best 30×30 booth designs tend to commit to a smaller number of ideas and carry them out well. A few approaches that work particularly well in this size:
- The central feature. Build the booth around one striking centerpiece, such as a product tower, a branded structure or a large LED wall, and arrange everything else around it. Visitors orient themselves by the feature, and it becomes the landmark people use to find you in a crowded hall.
- The open perimeter with an enclosed core. Counters and displays run along the edges to invite people in, while a closed core holds meeting space and storage. This gives you a welcoming outer edge and still provides privacy where it is needed.
- The split-level look. Using a raised platform for one half of the booth, even by a few inches, divides the space visually without adding walls. It can hold a demo area or lounge and makes the exhibit look more architectural.
- The wraparound graphic wall. A curved or angled wall running along two sides offers a large surface for storytelling, and it frames the interior so the booth feels less exposed from the aisles.
For more 30×30 trade show booth ideas from real exhibits, our past booth projects shows how different companies have approached the same footprint.
Design Features Worth Investing In
On a large booth, budget decisions matter, and it helps to know which elements make the biggest difference to visitors.
Overhead structures and hanging signs
An island exhibit can usually carry a hanging sign or overhead truss that lifts your logo above the sightlines of the hall. This is often the single most effective way to be found from across the venue. Height limits, rigging rules and approval processes vary between shows and venues, so check the exhibitor manual early and include the rigging timeline in your schedule.
Lighting
Convention halls tend to be lit evenly and without much character, so your own lighting does a lot of work. Warm accent lighting on product displays, backlit fabric graphics and LED edging on counters make a booth stand out from the hall and show your products to better effect. For a larger footprint, it also helps to vary the brightness between zones so the demo area feels lively and the lounge feels calmer.
Video walls and screens
A large screen works well as a focal point in a 30×30 or 30×40, but only if the content is made for it. Short looping clips, product footage and customer stories hold attention better than long presentations, and silent content with captions avoids competing with the noise of the hall.
Flooring
With 900 to 1,200 square feet to cover, flooring does a lot to define the character of your booth. Different materials or colors can mark the boundaries between zones, and a thick padded surface makes a real difference to how your staff feels at the end of day three.
Power, data and connectivity
Larger exhibits typically need more electrical drops, data lines and wireless capacity than smaller ones, especially with demo stations, screens and lead capture running at the same time. These services are ordered through the venue, so it is worth placing the order early and mapping outlets onto the floor plan.
Double-Deck Exhibits and Other Ambitious Ideas
Some exhibitors, particularly at the 30×40 level, consider a second story for hospitality or private meetings. A double-deck design can add a lot of usable space and a strong visual presence, but it usually comes with engineering reviews, additional show approvals and higher build costs, so it needs to be planned well ahead of the event. For most companies, a well-organized single-level exhibit with an overhead sign provides most of the impact at a more manageable cost and with a lower risk of delays.
Renting vs. Building a Large Booth
Large exhibits represent a significant investment, and many companies find that a 30×40 trade show booth rental makes more financial sense than owning one. Storage, shipping and refurbishment costs for a structure this size are substantial, and a booth built for one show may not fit the footprint or theme of the next. Renting lets you adjust the design for each event and avoids the cost of keeping a large structure in a warehouse between shows.
A typical rental package from Orlando Exhibit Rentals includes design, graphics, furniture, lighting, flooring, delivery, installation and dismantling, so that you deal with one team rather than several suppliers. Browse our trade show booth rentals’ range, or look at our custom trade show exhibits if you want a structure designed from scratch around your brand.
Planning Timeline for a Large Booth
Large exhibits take longer to prepare than small ones, and starting early gives you room to adjust. A realistic schedule looks something like this:
- Four to six months before the show: Confirm your space, review the exhibitor manual and set a budget.
- Three to four months before: Choose a rental or custom approach, approve the floor plan and begin the design.
- Two to three months before: Finalize graphics and approve renderings, and submit any rigging or structural drawings to the show.
- One to two months before: Order electrical, data and other venue services, and confirm shipping and installation dates.
- Final weeks: Brief your staff on the layout, confirm travel and badge details, and review the installation schedule with your exhibit provider.
Custom projects tend to run three to six weeks from concept to installation at minimum, and more complex builds take longer, which is why starting early matters.
Mistakes to Avoid
- Leaving the booth too open. Without defined zones, a large booth can feel empty and visitors may not know where to go.
- Overcrowding the floor. Filling every corner with furniture and displays makes it hard to move around and hides the best features.
- Ignoring sightlines from all four sides. A feature that looks great from one aisle may be blocked or unattractive from another, so check the design from every direction.
- Underestimating staffing. A 30×40 needs enough people to cover the whole perimeter, with a plan for breaks and rotation.
- Skipping the show rules. Height limits, rigging, fire codes and electrical requirements can affect the design, and finding out late can mean expensive changes.
Getting Started
A well-planned 30×40 trade show booth design gives your team space to meet, demonstrate and build relationships, and a thoughtful 30×30 layout can do much of the same with a tighter footprint. The right choice depends on your goals, your staffing and the way visitors will move through the hall. When you are ready to discuss your show, request a quote with your dates and booth size, or contact our Orlando team to talk through the options before you decide.
Frequently Asked Questions
How big is a 30x40 trade show booth?
A 30×40 booth is 1,200 square feet, usually set up as an island exhibit that visitors can approach from four sides.
What is the difference between a 30x30 and a 30x40 booth?
The 30×30 covers 900 square feet and the 30×40 covers 1,200, so the larger space leaves room for an extra meeting area or a larger demonstration zone without crowding.
How much does a 30x40 trade show booth rental cost?
The price depends on the design, graphics, structures, lighting and services included, as well as the venue and installation requirements. The most reliable way to get an accurate figure is to send your show details and request a quote.
Can a 30x30 booth have meeting rooms?
Yes. Most 30×30 booth designs include at least one enclosed or semi-enclosed meeting room, usually placed in the core of the booth to keep the perimeter open.
Do I need approval for hanging signs or double-deck structures?
Usually, yes. Most venues and show organizers require drawings and approvals for overhead structures, so check the exhibitor manual and allow time for the review.
How early should I start planning a large exhibit?
Four to six months ahead is a comfortable window for a large rental or custom booth, and earlier is better for a double-deck design.
Do you serve venues other than the Orange County Convention Center?
Yes. Orlando Exhibit Rentals works with exhibitors at the OCCC, Rosen Shingle Creek, Gaylord Palms and other Orlando venues.
CONTACT US
AND AN EXHIBIT EXPERT WILL GET BACK TO YOU SHORTLY!
